The Documents and Skip Info Utility let’s you batch import debtor information directly to the Skip Info or Documents section inside Collections MAX Professional.
The software will read the files and then insert those files into the database which is then attached to the debtor’s account.
This requires the data to be in individual files in the same folder. You can have the data on text files (.txt or .dat), Microsoft Word files (.doc or docx), or Adobe PDF files (.pdf) .
Clicking the Open Folder button will allow you to select the directory that contains all of your files that you want to import the information from. It is best to have ONLY the files you want to import inside the folder as the software will attempt to read all of the files detected.
![]()
Clicking the Refresh button will reset the screen to the riginal way it was when it was first loaded.
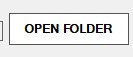
This selection tells how and where you want these files to be loaded into Collections MAX.
Skip Info – Selecting this option will put the files in the Skip Info section in Collections MAX Professional. All of the files will be read into the program and NOT LINKED. If you have files like PDF files that have images in them or you need to preserve their formatting you would be better off linking them by selecting Documents. Skip Info also doesn’t need a network drive like the Documents option does, so if you have remote collectors the Skip Info option will probably work better.
Documents – Selecting this option will LINK the documents into the Documents section of Collections MAX Professional. It is VERY IMPORTANT that you put the folder that contains the files in a network drive that is accessible to all collectors under the same drive letter BEFORE selecting the folder and loading the files. This is because the software will link the path that the folder is in currently and if you have these files on your C: drive that folder is usually not accessible over a network.
![]()
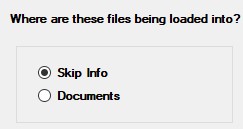
The setup of the files that you want to import is EXTREMELY IMPORTANT using this utility. What this means is the software looks at the prefix of the file to determine which account in the system to tie the file to. So for example if you had an account with a FILENUMBER of ABC123 and it was a text file…… the file name would look like ABC123.txt and the filenumber + extension selection should be selected. So either the FILENUMBER or the ACCOUNT NUMBER should be in the name of the file in order for the software to link it correctly.
This allows you to select the way that your files are laid out. If your files are the File Number + the extension (Example: ABC123.txt) then please select the File Number + extension selection.
If they are the Account Number + extension (Example: 1122334455667788.pdf) then select the Account Number + extension selection.
Selecting a single account in the left data grid and then clicking the Exclude button will remove it from the data grid so it won’t be imported.
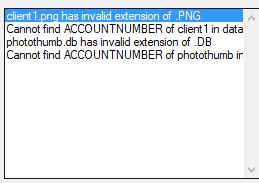
The error log will show you any errors that the software encounters after you press the Test button.
![]()
You need to test your files before you can import them. Clicking the Test button will run a series of tests to tell you if there are any errors that will be encountered.
You will need to fix any errors before the import button will be visible to you so that you can finish the import.
The import button will ONLY BE VISIBLE WHEN ALL TESTS PASS! Click this button 1 time to import your accounts.